

How to Brew Cafe Quality Coffee at Home
Table of Contents
- Start With Fresh, Ethically Sourced Beans
- Understand Coffee-to-Water Ratio for Consistent Brewing
- Coffee Grind Size Chart and Selection
- How to Make Pour-Over Coffee: Step-by-Step
- Other Brewing Methods That Deliver Cafe Results
- How to Improve Coffee Taste at Home
- Frequently Asked Questions
Last Updated: October 11, 2026
Start With Fresh, Ethically Sourced Beans
The foundation of brew cafe quality coffee at home starts before you brew. Fresh beans make the difference between a flat cup and something truly exceptional.
Look for beans with a roast date printed on the bag. At Bloomworks Coffee, we roast to order specifically to ensure your beans arrive at peak freshness, not sitting in a warehouse for months.
Ethically sourced beans matter too. When coffee farmers are paid fairly, they invest in better cultivation practices. That care shows up in your cup.
Store your beans in an airtight container away from heat and light. Whole beans stay fresher longer than pre-ground coffee. Grind only what you need right before brewing.
Understand Coffee-to-Water Ratio for Consistent Brewing
The coffee-to-water ratio is your most important control lever for consistency. Get this right and every cup tastes similar. Miss it and even great beans disappoint.
The standard starting point is 1:16 by weight. That means 1 gram of coffee to 16 grams of water.
This ratio works across most brewing methods. Adjust it based on taste preference. Prefer stronger coffee? Try 1:15. Want something lighter? Move to 1:17.
Use a kitchen scale to measure both coffee and water by weight, not volume. A cup of grounds varies wildly depending on grind size and how tightly packed they are.
| Ratio | Coffee Strength | Best For |
|---|---|---|
| 1:14 | Very Strong | Espresso-like intensity |
| 1:16 | Balanced | Most brewing methods |
| 1:18 | Light & Bright | Delicate single-origins |
Start with 1:16 and adjust from there based on what you taste.
Coffee Grind Size Chart and Selection
Grind size determines how fast water extracts flavor from the grounds. Wrong grind size leads to under-extraction (sour, weak coffee) or over-extraction (bitter, harsh coffee).
Grind Size by Brewing Method
Coarse grind works for French press and cold brew. The larger particles slow water contact, preventing over-extraction during long steeping times. Texture: similar to breadcrumbs or sea salt.
Medium grind suits drip coffee makers and pour-overs. It balances extraction speed for most home brewing methods. Texture: similar to fine sand.
Medium-fine grind works for Aeropress and Moka pot brewing. Texture: slightly finer than sand, like powdered sugar.
Fine grind belongs in espresso machines. The pressure and short contact time need finely ground particles to extract properly. Texture: similar to flour or cocoa powder.
Burr Grinders vs. Blade Grinders
Use a burr grinder, not a blade grinder. Burr grinders produce consistent particle size by grinding beans between two rotating surfaces. Blade grinders chop randomly, creating dust and chunks in the same batch. Inconsistent grind size leads to uneven extraction and muddy flavor.
Burr grinders come in two types: conical burrs and flat burrs. Both work well for home brewing. Conical burrs are quieter and slightly more forgiving. Flat burrs are more precise but require more cleaning. Entry-level burr grinders cost $30-60 and are sufficient for pour-over and French press. Espresso enthusiasts often invest $100-200+ for grinders with finer adjustment steps.
A Tested Recipe: Pour-Over with Exact Measurements
Here's a repeatable recipe that produces cafe-quality coffee every time. Use this as your baseline, then adjust based on taste using the troubleshooting method in the next section.
Ingredients:
- 25 grams whole coffee beans (roasted within 2 weeks)
- 400 grams filtered water
Equipment:
- Burr grinder (set to medium grind)
- Kitchen scale (accurate to 0.1 grams)
- Pour-over dripper (ceramic, glass, or plastic)
- Paper or metal filter
- Gooseneck kettle
- Thermometer or temperature-display kettle
Steps:
- Heat water to 200°F. If you don't have a thermometer, boil water and wait 30 seconds before pouring.
- Grind 25 grams of beans to medium consistency (texture of fine sand). Grind immediately before brewing.
- Place filter in dripper and rinse with hot water. Discard rinse water.
- Add ground coffee to filter. Pour 50 grams of hot water over the grounds and wait 30-45 seconds (bloom phase). You'll see the grounds bubble as CO2 escapes.
- Pour the remaining 350 grams of water slowly in circular motions over 2-3 minutes. Keep the water level consistent in the dripper.
- Total brew time: 3-4 minutes. Coffee should drip through completely by 4 minutes.
- Pour into your cup and taste.
Expected result: Bright, clean, balanced coffee with no sourness or bitterness.
Scaling this recipe:
- For one 8 oz cup: 15g coffee + 240g water
- For two 8 oz cups: 30g coffee + 480g water
- For four 8 oz cups: 60g coffee + 960g water
Always maintain the 1:16 ratio (1 gram coffee to 16 grams water) and the same grind size, bloom time, and total brew time.
Grind Fresh, Right Before Brewing
Grind your coffee immediately before brewing. Ground coffee loses volatile aromatics within 15 minutes. Whole beans preserve flavor for weeks when stored in an airtight container away from heat and light.
How to Make Pour-Over Coffee: Step-by-Step
Pour-over brewing gives you direct control over water temperature, pour speed, and contact time. This method rewards attention and produces consistently excellent coffee.
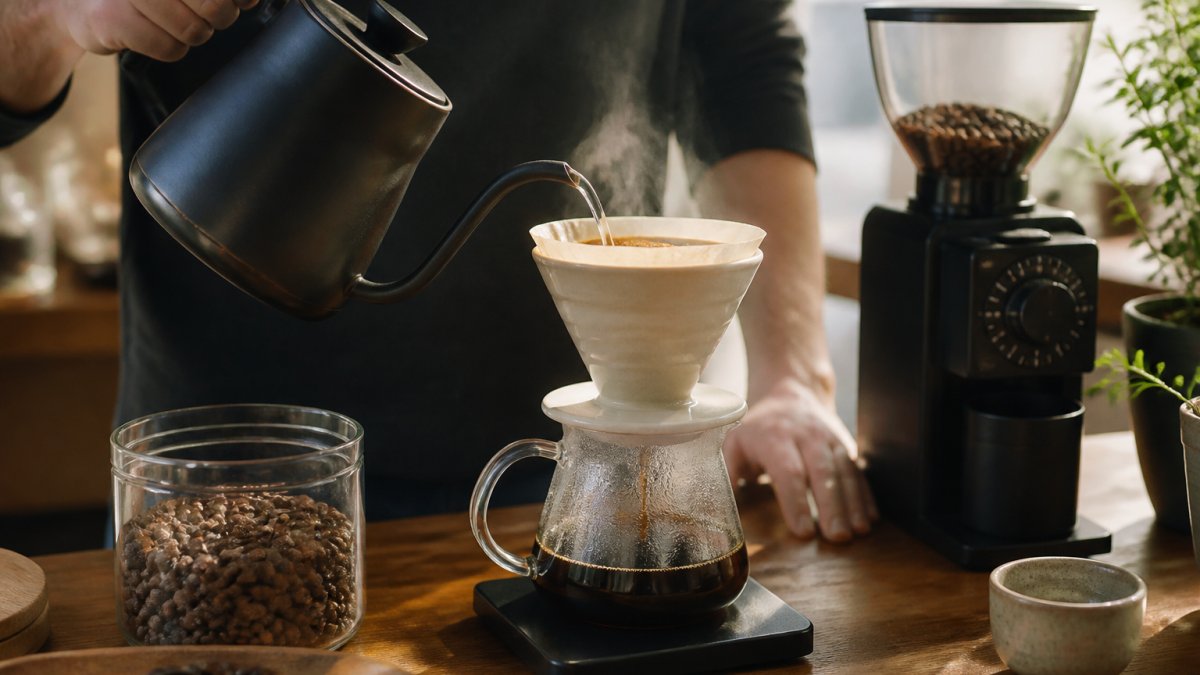
Equipment You'll Need
- Pour-over dripper (ceramic, glass, or plastic cone)
- Paper or metal filters
- Gooseneck kettle for controlled pouring
- Kitchen scale
- Whole coffee beans
- Burr grinder
- Hot water (195-205°F)
The Brewing Process
Step 1: Prepare your equipment. Place the filter in the dripper and rinse with hot water.
Step 2: Grind your beans. Use a medium grind, similar to sea salt texture. Grind 25 grams of whole beans right before brewing.
Step 3: Bloom the grounds. Add the ground coffee to the filter.
Step 4: Pour slowly. Pour the remaining water in circular motions over 2-3 minutes. Keep the water level consistent. Pouring too fast under-extracts.
Step 5: Finish brewing. Total brew time should be 3-4 minutes. The coffee should drip through completely by then.
This method produces bright, clean coffee. The paper filter removes oils, highlighting the bean's natural flavors.
Other Brewing Methods That Deliver Cafe Results
Drip Coffee Maker Brewing
Automatic drip machines offer convenience without sacrificing quality. The key is using fresh beans and the right ratio.
Fill the water reservoir. Add a filter and ground coffee using the 1:16 ratio. Start the machine and wait. Most drip makers brew in 5-8 minutes.
The main limitation: water temperature. Budget drip makers often brew below 195°F, leading to under-extraction. Invest in a machine with adjustable temperature or one specifically designed for specialty coffee.
French Press Brewing
French press uses immersion brewing. Coffee grounds steep directly in hot water, then you press down a metal filter to separate grounds from liquid.
Add coarse ground coffee and hot water (1:16 ratio) to the press. Stir gently. Cover and wait 4 minutes. Press the plunger down slowly over 30 seconds. Pour immediately into your cup.
French press extracts oils that paper filters remove, creating a fuller, richer cup. Clean your press thoroughly after each use to prevent rancid oil buildup.
Espresso Brewing
Espresso requires an espresso machine and skill. Hot water forces through finely ground coffee under pressure, producing a concentrated shot in 25-30 seconds.
The learning curve is steep. Variables like grind size, tamping pressure, water temperature, and machine type all affect the result. Many home espresso enthusiasts spend months dialing in their setup.
Start with a mid-range machine ($300-600) before investing heavily. Cheap machines won't reach proper pressure. Premium machines cost $1000+.
Cold Brew Preparation
Cold brew steeps coarse ground coffee in room-temperature water for 12-24 hours. The result is smooth, low-acid coffee concentrate.
Mix coarse grounds and cold water at a 1:4 ratio (by weight). Stir occasionally. Strain through a fine mesh or cheesecloth. Dilute with water or milk before drinking.
Cold brew keeps refrigerated for two weeks. It's ideal for batch-brewing coffee ahead.
How to Improve Coffee Taste at Home
Water Quality and Temperature Matter
Water is 98% of your cup. Tap water with high mineral content or chlorine flavors affects the final taste.
Use filtered water if your tap water tastes off. Mineral content matters too. Water that's too soft under-extracts. Water that's too hard over-extracts. Aim for moderate mineral content (150-250 ppm).
If you're unsure about your water hardness, inexpensive test strips are available at hardware stores and online for $10-15.
Temperature directly impacts extraction speed. Brew between 195-205°F. Water hotter than 205°F over-extracts and tastes bitter. Cooler water under-extracts and tastes sour.
Use a thermometer or a gooseneck kettle with temperature display. Many home brewers ignore water temperature and wonder why their coffee tastes wrong.
Troubleshooting by Taste: A Systematic Dialing Process
When your coffee doesn't taste right, resist the urge to change multiple variables at once.
If your coffee tastes sour or weak (under-extraction):
The grounds didn't extract enough flavor. Start by adjusting grind size first, since it has the biggest impact.
- Grind finer. Use a noticeably finer grind (move from medium to medium-fine). Brew one batch and taste.
- If still sour, increase brew time. For pour-over, slow your pour rate so water spends more time in contact with grounds. For French press, extend steeping from 4 minutes to 4.5 minutes.
- If still sour, use hotter water. Increase temperature by 5°F (e.g., from 200°F to 205°F) and brew again.
- If still sour, increase coffee dose. Use slightly more grounds (e.g., move from 25g to 27g for a pour-over) while keeping water weight the same.
Test only one change per brew. This isolates which factor actually improved the taste.
If your coffee tastes bitter or harsh (over-extraction):
The grounds extracted too much flavor, often from steeping too long or grinding too fine.
- Grind coarser. Move to a noticeably coarser grind (e.g., from medium to medium-coarse). Brew and taste.
- If still bitter, decrease brew time. For pour-over, pour faster. For French press, reduce steeping to 3.5 minutes.
- If still bitter, use cooler water. Drop temperature by 5°F and brew again.
- If still bitter, use less coffee. Reduce your dose by 1-2 grams per brew.
If your coffee tastes flat or dull:
This almost always means stale beans. Beans older than four weeks lose their brightness and complexity.
If your coffee tastes good but you want it stronger or weaker:
Don't change grind or brew time, these affect flavor quality, not just strength. Instead, adjust the coffee-to-water ratio. For stronger coffee, increase your dose by 1-2 grams.
Common Mistakes to Avoid
Don't use water straight from the tap without filtering. Chlorine and mineral imbalances ruin good beans.
Don't store beans in the freezer. Temperature fluctuations cause condensation inside the bag, accelerating staling.
Don't brew with water that's too hot. Many people boil water and pour immediately, creating bitter coffee.
Don't grind all your beans at once. Ground coffee loses flavor within hours.
Don't skip the bloom step in pour-over. Those 30-45 seconds dramatically improve extraction and taste.
Don't change multiple variables between brews. You won't know which adjustment actually fixed the problem, and you'll never dial in consistency.
Frequently Asked Questions
What coffee-to-water ratio should I use to brew cafe quality coffee?
The standard ratio is 1:16 (one part coffee to 16 parts water by weight). For a stronger cup, use 1:15; for a lighter cup, try 1:17. Measure both your coffee grounds and water on a kitchen scale for consistency. Most specialty coffee shops follow this ratio to achieve balanced extraction and flavor.
How fresh should coffee beans be for the best flavor?
Use beans within 2-4 weeks of the roast date for optimal flavor. Whole beans stay fresher longer than pre-ground coffee. Store them in an airtight container away from heat, light, and moisture. Bloomworks Coffee roasts beans to order, ensuring peak freshness when they arrive at your door.
What grind size should I use for different brewing methods?
Use coarse grind for French press and cold brew, medium grind for drip coffee makers, and fine grind for espresso. Pour-over coffee typically uses medium-fine grind. A burr grinder gives you consistent particle size, which directly affects extraction and flavor. Inconsistent grind leads to uneven brewing and bitter or sour tastes.
Why does my home-brewed coffee taste bitter, and how do I fix it?
Bitter taste usually means over-extraction, caused by too-fine grounds, water that's too hot, or too long brew time. Try using a coarser grind, lowering water temperature to 195-205°F, or reducing brew time. If coffee tastes sour, you're under-extracting: use finer grounds, hotter water, or extend brew time slightly.